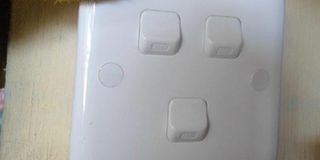
Do it yourself :Change a light switch

Light switches are one of the functional electrical appliances that can last for years, if they are of good quality. However, they can get faulty or wear out as time goes by. This can be as result of poor wiring, poor quality wires or even switches, which are in most cases sold cheaply.
Joseph Bwanika Bbale, an electrical engineer with BBJ Electrical Services says these can easily be replaced if they get faulty, old, broken or damaged or when the person wants to change the fashion or type of switches in the house with the aim of improving on the appearance.
He explains the different steps which you can follow to replace a single-location on/off switch.
1. Safety first
The first step is all about safety. Make sure you are well protected with gloves and rubber shoes to avoid endangering your life.
Get everything you will need ready. This will include a screw driver, phase tester (it looks like a screw driver and is used to find out whether there is a live circuit), pliers, screws and the new switch.
Make sure the switches are of the same type because they differ.
A single-pole switch is different from a three-way switch; one has two screw terminals plus a ground terminal whereas the other has three terminals plus a ground terminal.
2. Turn off the power
Switch off the power from the main server (main switch) before the process starts to avoid any form of short circuit in the process.
3. Loosen the switch
In case your switch has a cover, take it off then loosen the screws to separate the switch from the wall and allow you to identify the fault, if any. If the wires are fine, then it is safe to establish that it is the switch at fault.
4. Observe the wiring
Carefully observe the position of the wires to avoid mixing them up while installing the new switch.
5. Separate wires from the switch
Carefully separate the wires, one at a time, from the switch and take note of the colours of the wires and which direction they go to avoid any kind of spark that might lead to a fire outbreak.
6. Wire the new switch
Get the new switch and place fresh open wires in it. You turn them into open wires by stripping off at least three quarters of an inch of the insulation with pliers. Make sure they are well placed and tightly screwed to avoid sparks.
However, compare the old switch with the new one to identify each corresponding screw terminal or wire lead. In the same way, make sure the new switch carries the same voltage and amperage ratings as the old switch to avoid mistakes (these are engraved on the insides of the switches).
7. Check for a live circuit
After the switch is well connected, switch on the power and use a phase tester to prove the work done. This tool helps to show whether there is power after connection or not.
8. Screw in the switch
After everything is done and all the procedures are properly followed, fix the wires back into the electrical box, and then secure the new switch in place with the provided screws, tighten them with a screw driver to make it firm. Put the cover back and you have yourself a new switch.


