How to fix a leaking tap

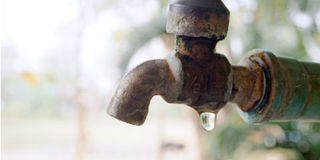
Do not panic when your faucet (tap) starts leaking, you can actually fix it yourself. COURTESY PHOTO
What you need to know:
Before you start
• Shut off the water under the sink.
• Close the sink drain; cover it with a rag to catch dropped parts.
• Tape the jaws of your wrench with a layer of duct tape to avoid scratching the fixture.
• Establish a place to lay out parts in order of removal.
• Use distilled white vinegar and a soft scouring pad for removing mineral deposits on faucet parts.
Find your faucet (tap)
There are four kinds of faucets: compression, cartridge (sleeve), ceramic disk, and ball type.
A compression faucet relies on rubber washers to seal the valve seat. Rubber washers wear out and must be replaced occasionally. The other types, often called washerless faucets, last longer but they too can develop leaks. When these cartridge, ceramic-disk or ball-type faucets leak, you can either replace the O-ring or neoprene seal that’s causing the leak or replace the entire assembly.
Compression faucets
Most leaky compression faucets need new seat washers. Remove the decorative cap on the handle, remove the handle screw, pull off the handle and use a crescent wrench to unscrew the packing nut. After unscrewing the stem, remove and replace the seat washer held in place by a brass screw. Coat the washers with nontoxic, heat-proof plumber’s grease. Pop the stem out of the packing nut and replace the O-ring, that is responsible for leaky handles.
O-rings range in size from 3/8 to 5/8 in, so it’s crucial to exactly match the size on your faucet. Coat the new O-ring with the plumber’s grease. Reassemble the faucet and tighten the packing nut.
If your faucet continues to leak, remove the stem and grind smooth the valve seat with a valve-seat dresser, a tool you temporarily screw down into the faucet.
Ball-type faucets
This type of faucet contains a lot of parts, and that often makes it difficult to find the cause of the leak. You can the trouble by buying a replacement.
But to fix it, first, remove the handle set screw and lift off the handle. Use adjustable pliers to remove the cap and collar. Using the special tool included in the faucet-repair kit, loosen the faucet cam and lift it out along with the cam washer and the rotating ball.
Reach into the faucet body with needle-nose pliers and remove the inlet seals and springs.
Next, cut off the O-rings, coat the new ones in nontoxic, heat-proof plumber’s grease and roll them on. Install new springs, valve seats and cam washers as you reassemble the faucet. Another more expensive option for an older faucet is to replace the entire fixture.
Cartridge faucets
To begin your ceramic cartridge faucet repair, pry off the decorative cap on the handle, remove the handle screw, tilt the handle back and pull it off.
If there’s a threaded retaining clip holding the cartridge in place, use needle-nose pliers to remove it, and then pull the cartridge straight up. Remove the spout and cut off the old O-rings using a utility knife. After coating the new O-rings with nontoxic, heat-proof plumber’s grease, reassemble the unit.
To replace the entire cartridge match the length of yours to the replacement cartridge length. Also match the stem end where the handle attaches.
Ceramic-disk faucets
Push the faucet handle back to access the set screw. Remove the screw and lift off the handle. Remove the escutcheon cap, unscrew the disk cylinder mounting screws and lift out the cylinder.
With a blunt screwdriver, lift out the neoprene seals from the cylinder (if the seals are damaged, replace them) and use distilled white vinegar and a plastic scouring pad to clean the cylinder openings.
Rinse thoroughly. Then replace the seals and reassemble the faucet. Move the handle to the “on” position and very slowly turn the water back on—the force of the returning water can fracture the ceramic disk.
If you’re replacing the entire cylinder, which seldom is necessary, merely set it in place and secure it with the new mounting screws.
Thisoldhouse.com


